Run Agent DVR on Raspberry Pi 5 with Docker: Setup, Camera Discovery and Performance
- Published
- Author
- peppe8o
- Reads
- 551
Agent DVR runs locally on a Pi 5 with Docker. Host networking enabled camera discovery; a 640×352 stream used about 30% of one CPU core.
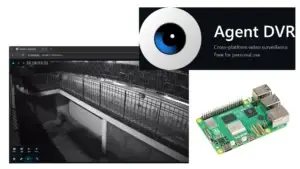
A Raspberry Pi 5 with 2 GB of RAM can run Agent DVR as a local video recorder for ONVIF network cameras, but the stream you choose affects processor load, and Docker networking affects whether cameras appear automatically. In tests with one camera, a 640×352 live stream averaged 29.9% of one CPU core; a 1920×1080 stream averaged 52.5%. The tested setup used Docker Compose, Raspberry Pi OS Lite 64-bit, and host networking.
Agent DVR is the current cross-platform system from iSpy for managing cameras through a browser. It can run on a Raspberry Pi and operate within a home network, without requiring an internet connection for local use. The setup below covers the trade-offs that shaped the test, the container configuration, first access, camera setup, storage, and measured resource use.
What Agent DVR does
iSpy began as a Windows video-surveillance application in 2007. Agent DVR, released in 2022, was rebuilt as its cross-platform successor and runs on Windows, macOS, Linux, Docker, and Raspberry Pi. Its browser interface provides access to compatible cameras, including ONVIF models, with features such as motion detection, alerts, and custom actions. New development is directed to Agent DVR; iSpy is no longer actively developed.
Agent DVR can keep camera feeds and recordings on local hardware and work offline for local use. The free offering covers private local use. Remote access through the platform, mobile applications, cloud storage, and business use require a subscription. Testing also found the free version limited to one local user account. Agent DVR is distributed as free software, but no official source-code location was found; the older iSpy application is described as open source.
The system requirements cited by the vendor FAQ include Raspberry Pi 4 and later. An ONVIF camera is a practical choice because the tested installation discovered one automatically when the container used host networking. Camera compatibility can be checked in the iSpy Connect camera database.
Measured performance on a Pi 5
The test platform was a Raspberry Pi 5 Model B with 2 GB of RAM, Raspberry Pi OS Lite 64-bit (Debian 13 “Trixie”), Agent DVR 8.2.5.0, and one ONVIF camera. The camera provided 640×352 and 1920×1080 streams. For the camera measurements, the live view stayed open in a browser while the container was sampled 12 times, five seconds apart.
| Condition | Average CPU | Average RAM |
|---|---|---|
| Idle, no camera or browser | 0.15% (one sample) | 169.6 MiB |
| Browser open, no camera | 4.7% (one sample) | 227.6 MiB |
| One camera at 640×352 | 29.9% (range 21.8–37.2%) | 407.4 MiB |
| One camera at 1920×1080 | 52.5% (range 40.5–67.4%) | 439.2 MiB |
Docker reports 100% CPU when a container uses one full processor core. On this four-core Pi 5, the 52.5% HD result therefore represents about half of one core, or roughly 12% of the total processor. The lower-resolution stream reduced the measured load by about 20 percentage points, while RAM use remained in the range of roughly 390–440 MiB with a camera connected. Leaving the Live URL unset produced CPU use close to the HD result, suggesting Agent DVR used the main stream by default.
The image occupied 1.18 GB as listed by Docker, while its reported content size was 273 MB. The first image download took 43.7 seconds and the container started in 6.2 seconds; the complete first docker compose up -d command took about 50 seconds. Download time depends on the network connection. These figures exclude recordings, which consume space in the mapped recordings directory.
Agent DVR did not detect a hardware video encoder on this system and used software encoding. These measurements cover one camera only. Recording, motion detection, AI features, and multi-camera operation were not tested, so the results do not establish how many cameras a Pi 5 can support in a particular installation.
Prepare the Raspberry Pi
Use a 64-bit Raspberry Pi OS installation. The Lite edition avoids a desktop environment and leaves more system resources for the DVR service; the desktop edition can also work if you prefer to administer the Pi locally through its terminal. Update the operating system before installing the container:
sudo apt update -y && sudo apt upgrade -y
uname -m
The architecture check should return aarch64. Install Docker and Docker Compose using the setup appropriate for Raspberry Pi OS, then verify both commands are available:
docker --version
docker compose version
There is a platform caveat for Raspberry Pi 5 users. The Agent DVR image page recommends Ubuntu or Ubuntu Server on Pi 5 because a Debian issue can affect Agent DVR and other .NET applications. In the reported test, however, the container started on Raspberry Pi OS Lite with Debian 13 Trixie, the web interface worked, and a camera streamed. If the same setup fails on your board, Ubuntu Server is one alternative to try.
Configure the container
Create a project directory and separate folders for configuration, recordings, models, and custom commands:
mkdir -p ~/agentdvr/{config,recordings,models,commands}
cd ~/agentdvr
Save the following as docker-compose.yml. Replace the time zone with the one used where the system operates. Check your user and group IDs with id; the example uses 1000 for both, which is common for the first Raspberry Pi OS user.
services:
  ispyagentdvr:
    image: ispysoftware/agentdvr:latest
    container_name: ispyagentdvr
    network_mode: host
    environment:
      - PUID=1000
      - PGID=1000
      - AGENTDVR_WEBUI_PORT=8090
      - TZ=Europe/Rome
    volumes:
      - ./config:/AgentDVR/Media/XML
      - ./recordings:/AgentDVR/Media/WebServerRoot/Media
      - ./models:/AgentDVR/Media/Models
      - ./commands:/AgentDVR/Commands
    restart: unless-stopped
The image is the Agent DVR container published by iSpy Software. PUID and PGID tell the container which user and group should own files it writes; incorrect values can cause permission errors. The web interface listens on port 8090, and TZ sets the time zone used for timestamps.
The four volume mappings keep configuration, recordings, AI models, and custom commands in folders on the Pi, outside the container. That means those files persist when the container is replaced or updated. Recordings will use the storage underlying the mapped folder, so the project directory’s location matters if the card has limited capacity.
Start the service in the project directory:
docker compose up -dAllow about 30 seconds on the first start. Agent DVR prepares directories and databases before the interface is ready. Check the container state with docker compose ps; it should show as Up and then, after initialization, healthy. To follow the startup log until the web listener appears, use:
docker compose logs -f | grep "Accepting http connections"The expected readiness message identifies the interface at http://*:8090/.
Why host networking matters
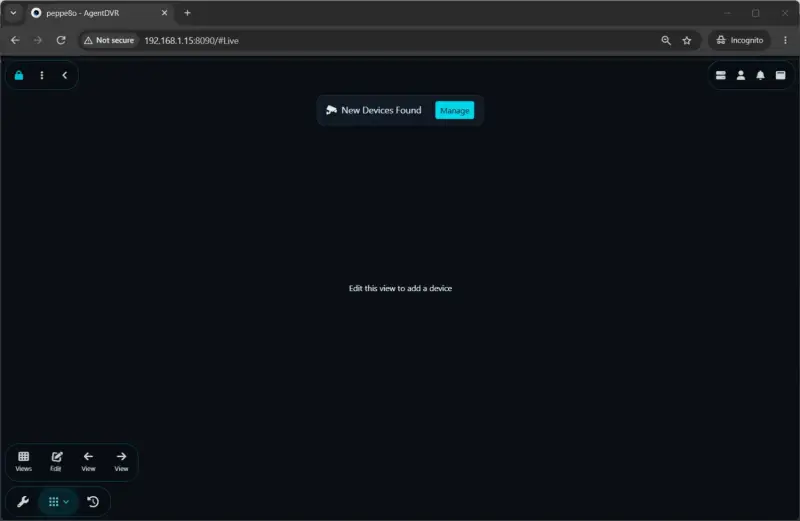
Docker’s default bridge network places the container on a separate network. In the test, Agent DVR found no network devices in this mode, and its camera discovery list remained empty. With network_mode: host, the container shares the Pi’s network, and the interface reported “New Devices Found” with the ONVIF camera listed.
Host networking exposes the container’s ports directly on the Raspberry Pi. Keep the service within the home network and do not forward its ports through the router. Agent DVR uses port 8090 for the web interface, plus port 3478 and UDP ports 50000–50100 for its TURN server.

If you choose Docker bridge networking instead, remove network_mode: host and publish the required ports in the Compose service:

ports:
  - 8090:8090
  - 3478:3478/udp
  - 50000-50100:50000-50100/udp
In bridge mode, add the camera manually and enter its network address. Host mode was the tested option for automatic discovery.

First access and account setup
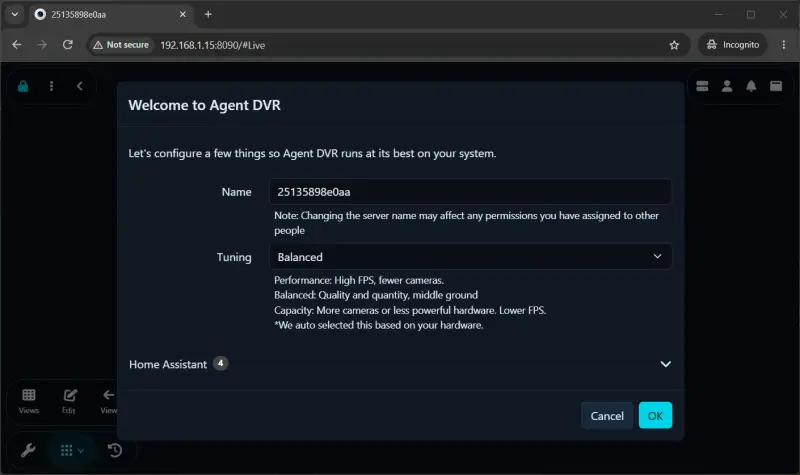
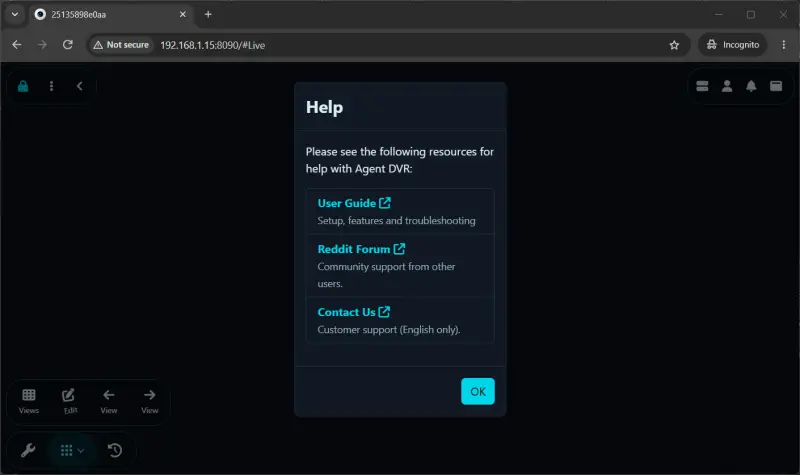
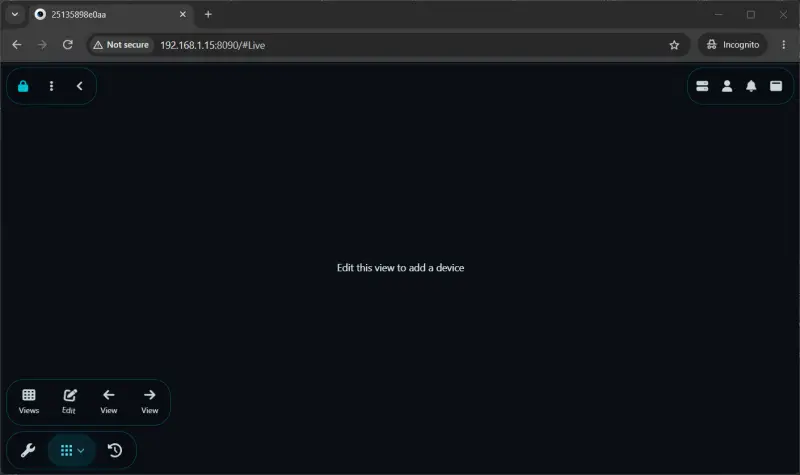
From a browser on another device on the same network, open http://<raspberry-pi-ip>:8090, substituting the Pi’s address. Select a language, then give the server a recognizable name in the welcome screen. The screen also offers a tuning setting. The test installation showed “Balanced”; although some documentation was reported to recommend “Capacity” for a Pi with 2 GB of RAM, the tester kept the default and noted that the setting can be changed later. Close the help window to reach the initially empty dashboard.

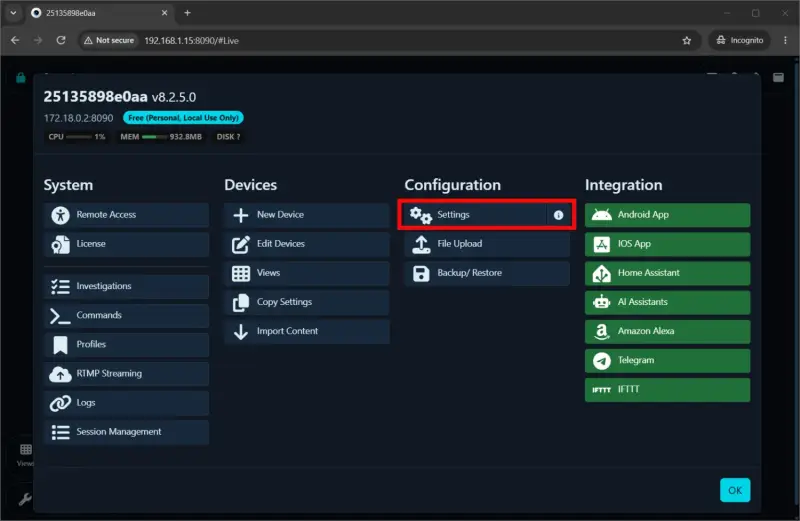
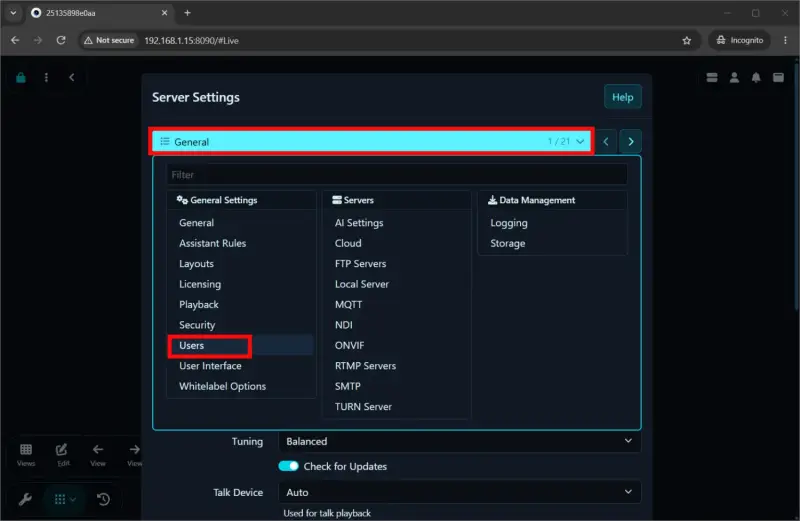
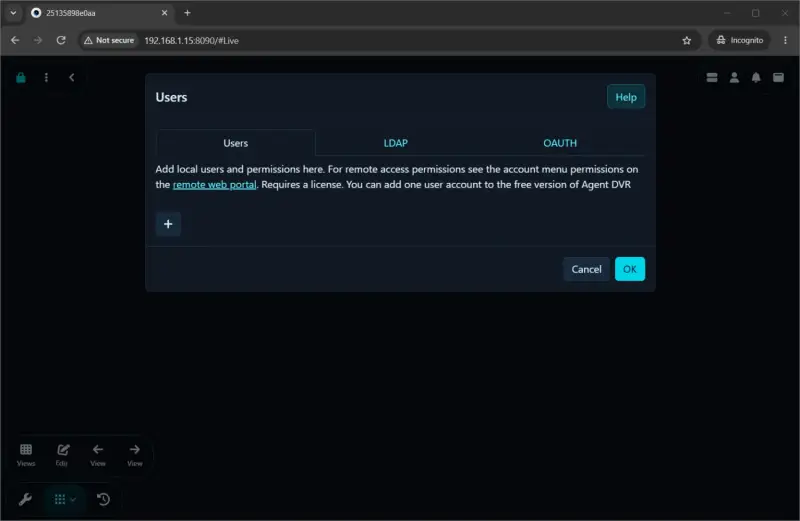
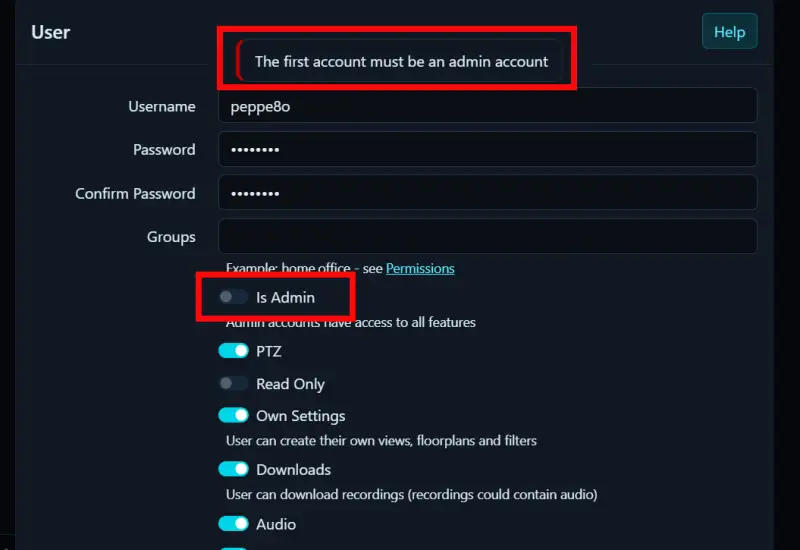
Create an administrator account before connecting cameras. Open the Server menu, choose Settings, then select Users from the General Settings menu. Use the plus button to add a username and password, and enable “Is Admin” for the first account. Confirm the entry and reload the browser page; the login screen may not appear until the page is refreshed.

The tested free version permits one account, so choose a long, unique password. The account protects access to the camera system and its recordings. This is separate from each camera’s own username and password, which Agent DVR requests when the device is added.

Add a camera and select streams
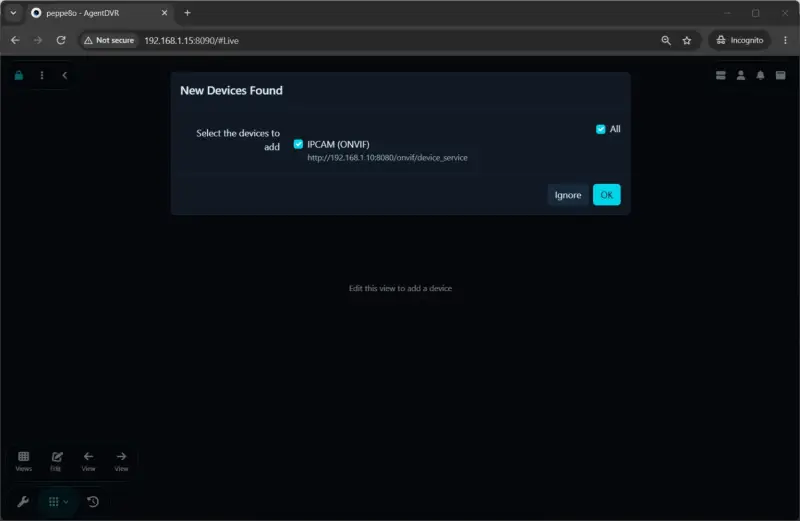
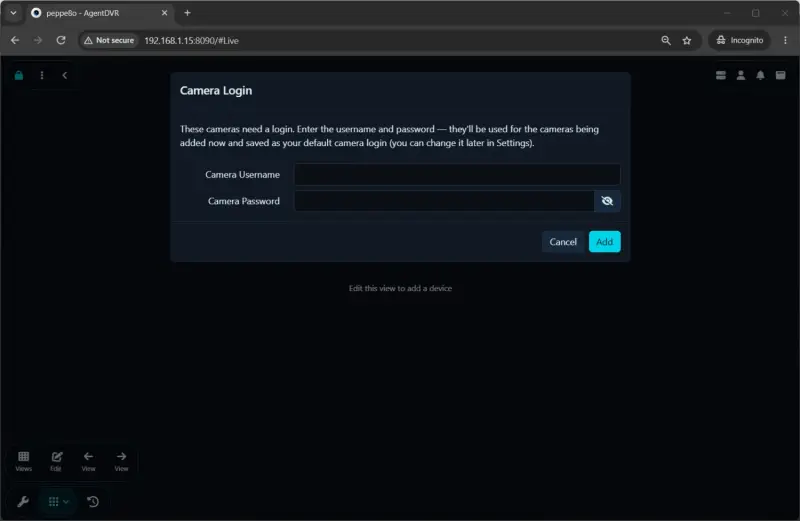
After signing in, host networking may surface a “New Devices Found” notice. Choose Manage, select the detected device, and confirm. For an ONVIF camera, Agent DVR then requests the camera’s credentials. These are set on the camera itself, often through its own application, and are not the same as the Agent DVR administrator login.

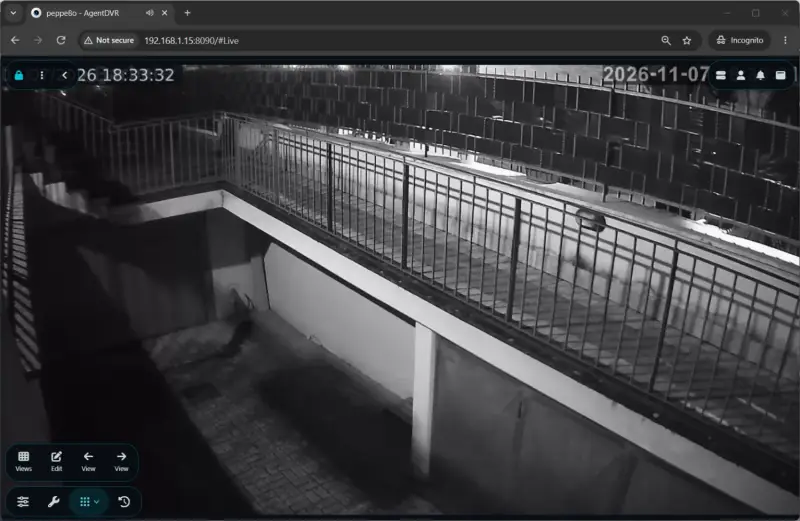
Agent DVR retains the camera credentials as the default for cameras added later, though they can be changed in settings. If cameras use different credentials, check this default when adding each one. Once the device is added, its live view appears on the dashboard.
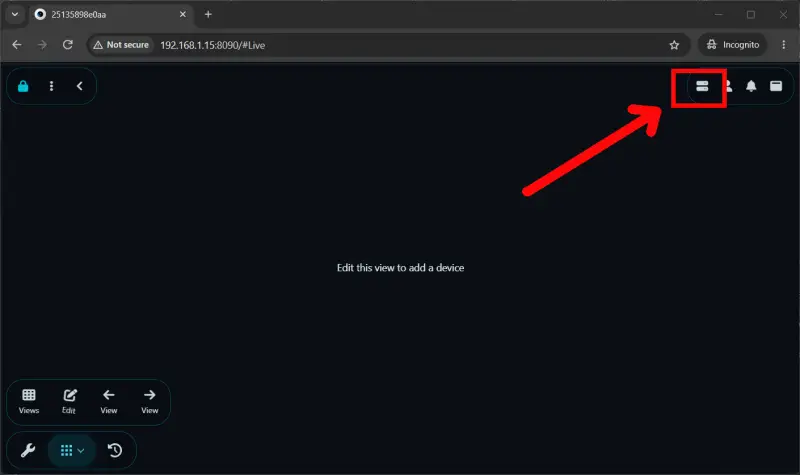
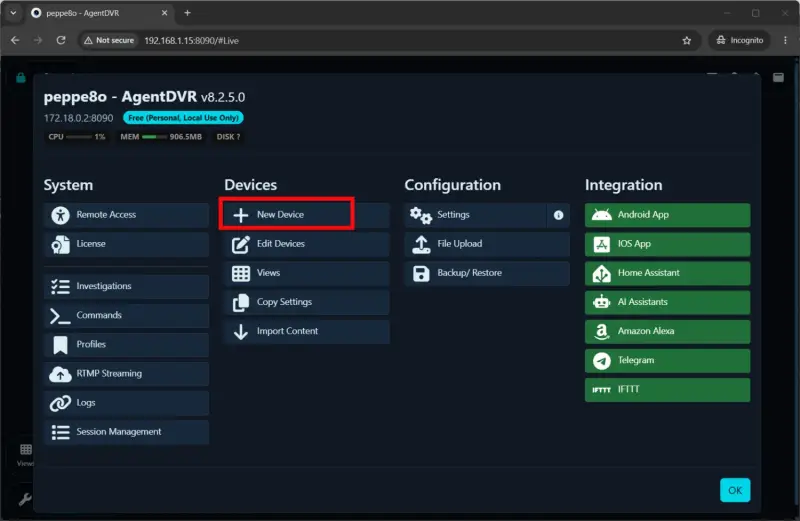
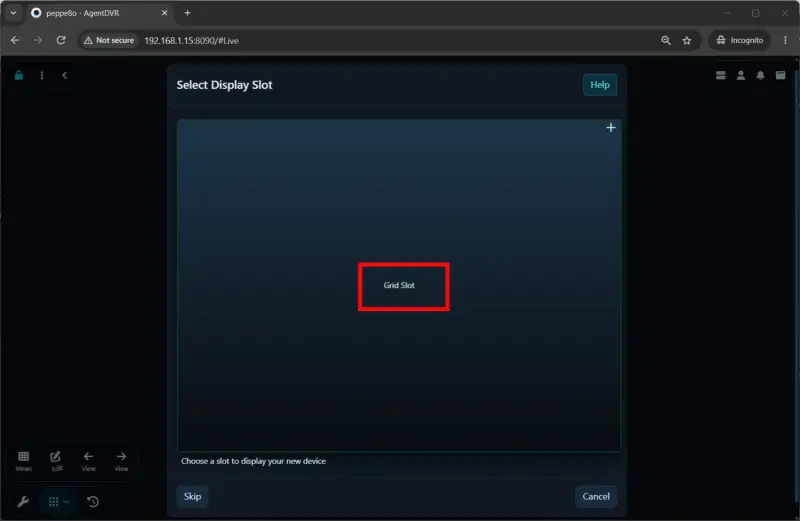
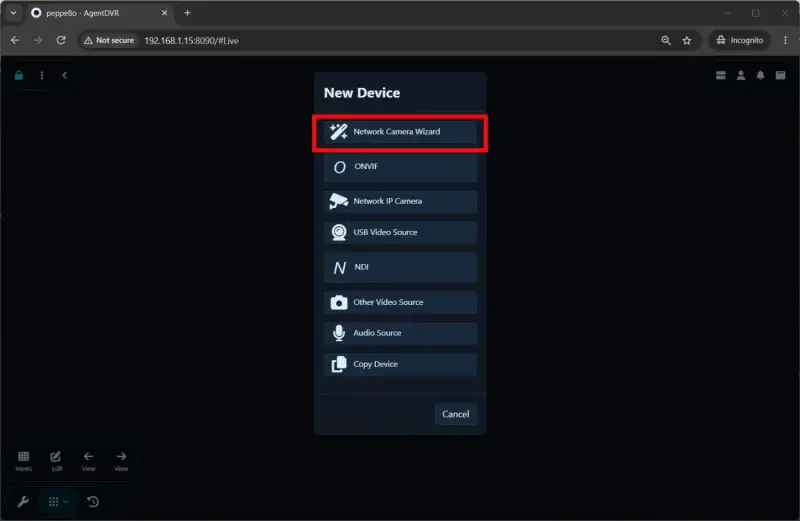
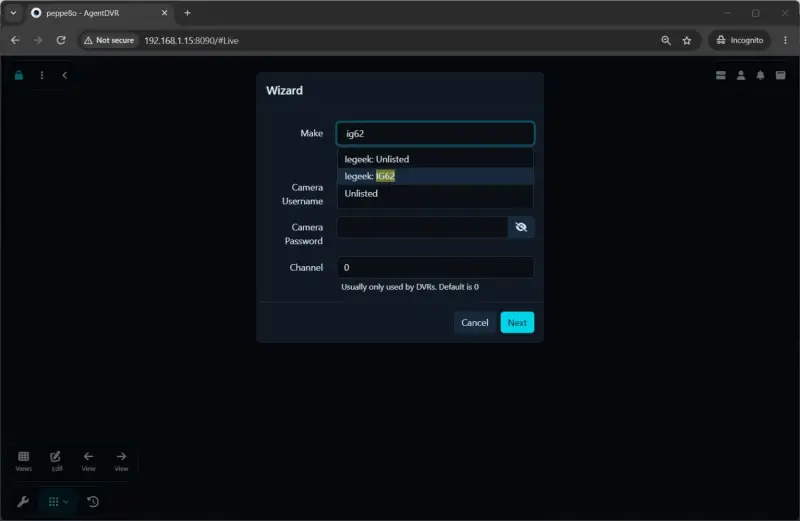
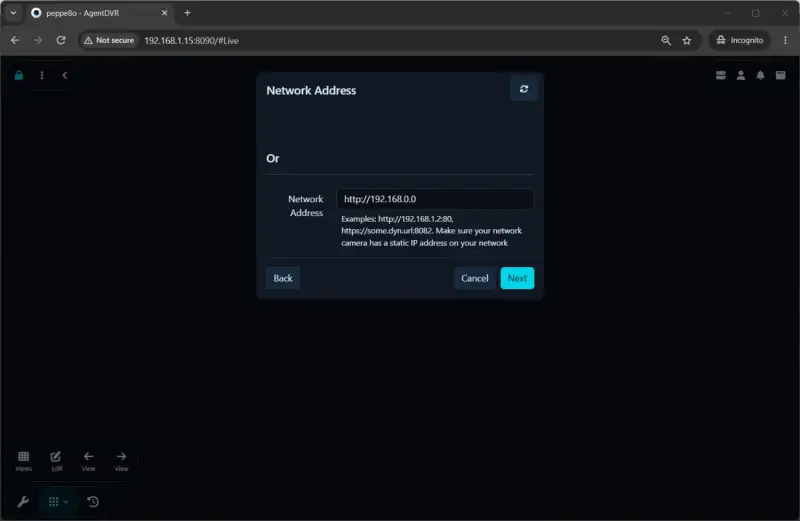
If discovery does not find the camera, use the Server menu’s New Device option, choose a grid slot, and open Network Camera Wizard. Configure the device options, then enter the camera make or model, credentials, and channel. The tested wizard left the channel at 0; entering part of a model name was sufficient to locate that camera in the available list. At the Network Address stage, choose the camera or type its address. A fixed address is recommended in the wizard because a changing address can break the saved configuration.
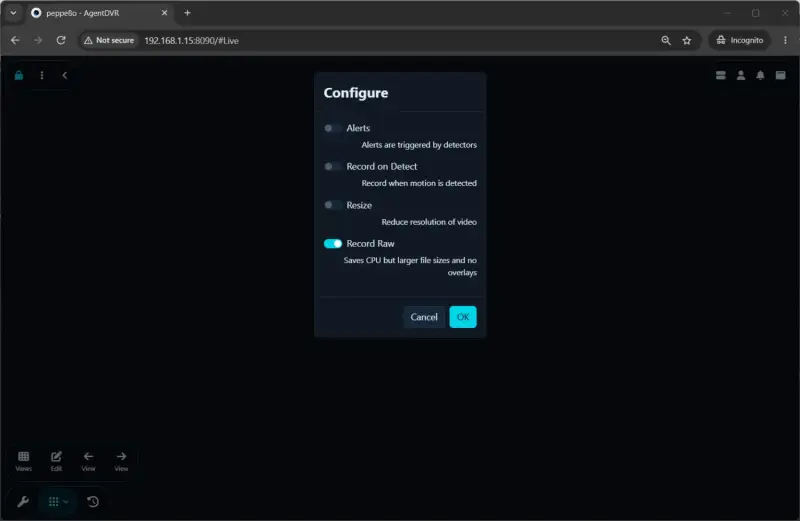
In the tested version, Alerts, Record on Detect, and Resize were initially off, while Record Raw was on. Record Raw can reduce CPU load, but it creates larger files and omits overlays. The manual workflow was not completed in the test, so the exact results may depend on the camera and its supported interfaces.
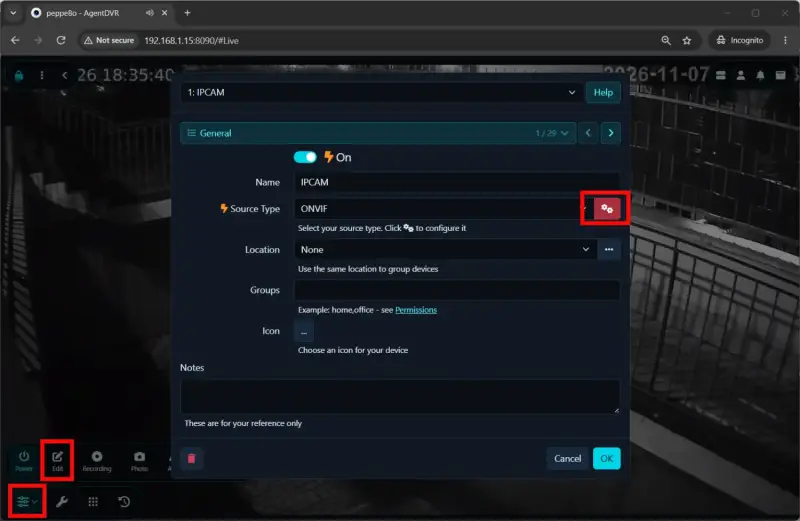
Many IP cameras offer both a high-resolution stream and a smaller sub-stream. To select one, edit the camera, open the gear next to Source Type in General settings, and choose Get Video URLs. Set the lower-resolution stream as the Live URL to reduce the work required for the dashboard. A higher-resolution stream can be assigned separately as the Record URL.
Agent DVR also offers “HD On Demand,” which connects to the high-resolution stream when a camera is maximized or recording begins. Its description indicates that recording may start a few seconds late and does not include buffered footage. The trade-off is lower ongoing bandwidth and processing demand in the live view, with a delay and no pre-event footage when switching to HD recording.
Choose storage for recordings
The Compose example writes recordings to ~/agentdvr/recordings, which will be on the microSD card if the project directory is there. That is adequate for initial setup, but continuous recording can generate substantial writes. A USB drive or NVMe SSD is a better fit for sustained recording than relying on the microSD card alone. The Pi 5 can use an NVMe drive through an M.2 HAT.
Mount external storage so it is available after a reboot, then change the recordings volume to point at that mount location. Raspberry Pi OS Lite users need to configure automatic mounting for their chosen drive. The amount of storage required depends on camera settings and recording behavior; the test did not measure recording volume or endurance.
Troubleshooting and remote use
If the browser reports a refused connection, confirm the service is running with docker compose ps and inspect recent logs with docker compose logs --tail 40. Give the first startup time to finish, verify the Pi’s IP address, and check that the browser is using port 8090. The tested system was 64-bit.
A startup banner may mention port 80 even when the web service is configured for another port. In the test, the actual listener followed AGENTDVR_WEBUI_PORT and used 8090. If camera discovery fails, check that host networking is enabled. For manual setup, use the camera’s address and ONVIF service port; the test camera used port 8080. Verify camera credentials and give the camera a fixed address.
The “No hardware video encoder was detected” message was a warning in the tested setup. Agent DVR used software encoding and continued to work. Settings also offered an optional GPL build of FFmpeg with software encoders; it was not enabled during the test. Folder permission errors point to a mismatch between PUID/PGID and the ownership of the project directories. Check the values reported by id.
For access away from home, the installation guide suggests using Tailscale on the Raspberry Pi to connect back to devices on the home network. Agent DVR’s free local mode itself does not include the platform’s remote access features.
Back up or remove the installation
To back up the configuration, custom commands, and models, stop the container and archive the relevant project files. Restart it afterward:
cd ~/agentdvr
docker compose stop
tar czf ~/agentdvr-backup.tar.gz config commands models docker-compose.yml
docker compose start
The example deliberately excludes recordings, which may occupy much more space; copy that directory separately if it needs to be retained. Agent DVR also has a Backup/Restore option in the Server menu under Configuration.
To stop and remove the container and image, run:
cd ~/agentdvr
docker compose down
docker image rm ispysoftware/agentdvr:latest
Removing the project directory as well deletes the saved settings and recordings.
How the measurements were made
Disk use was estimated by comparing df -H / before and after installing and starting Agent DVR. Docker’s image and container accounting was checked with docker system df. Startup time came from timing the initial docker compose up -d; the reported maximum resident set size for that command belongs to Docker Compose, not the DVR process.
Container CPU and memory came from docker stats, with 12 readings five seconds apart during each camera test. Averages were calculated from those readings. With host networking, Docker’s container network counters were not treated as useful measurements. Whole-system memory was checked separately with free -h and htop; the memory figure shown in Agent DVR’s server menu matched system-wide use rather than container-only RAM.
For a Pi 5, the clearest tuning choice in this test is to use the camera’s sub-stream for the live view and reserve HD for recording or on-demand viewing where the camera setup permits it. Host networking made discovery work, while an external recording drive offers a more suitable destination for sustained writes. Multi-camera capacity and recording load still need measurement on the intended camera mix.